
MOTOR
Week 06 | 10/07/2022
Circle Drafter
Mount a motor, such a nice way to end this half-semester class.
My original plan was to build a spinning top that is constantly spinning at a very low speed by connecting it to the motor. I bought 3 items from amazon, and none was what I expected. By the time I received the packages, it was too late to buy some new ones.
The items I bought are: speed reduction DC motor, shaft couplers, and two round steel rods that I planned to use to connect the spinning top. First, the motor — this was my fault, I missed the word “mini” in the product description. It is a tiny motor, and I never knew they even exist. It has a gearbox and it is a 50 RPM motor. Second, the shaft couplers — the ones I bought were joint shaft couplers, which can rotate freely, relatively. My original idea is to rotate the spinning top 45 degrees so it gives audiences a strange feeling when looking at it. Therefore the joint ones were chosen, however I thought they were lockable to certain degrees, but I was wrong. Third, the metal rods — the ones I received were not the ones I ordered — are way too long. Sadly, all three items were not what I was expecting, so I had to rethink what I should do with what I had at the moment.
I came up with a new idea, which is to make a machine which draws circles. Since the motor is so tiny, the rods are so long, and the shaft couplers are rotatable, it could be fun to visualize its rotation by drawing it down. Thanks to the standoffs, I was able to make the motor a base, using the same method from week 04. I was lucky to get some 1.3mm screws from the local hardware store so I can stabilize the motor on a piece of acrylic, which is connected to another piece to acrylic by the standoffs. When the base is made, the rest are not as difficult. The connection between the motor and the shaft coupler, and to the rods are tight and neat. I had to solder one of the joints to make it more rigid, in order to make the pen rotate smoothly. The overall process was more difficult than I thought but happily I made it work in the end, with the outcome of some happy accidents, which will be shown in the videos.

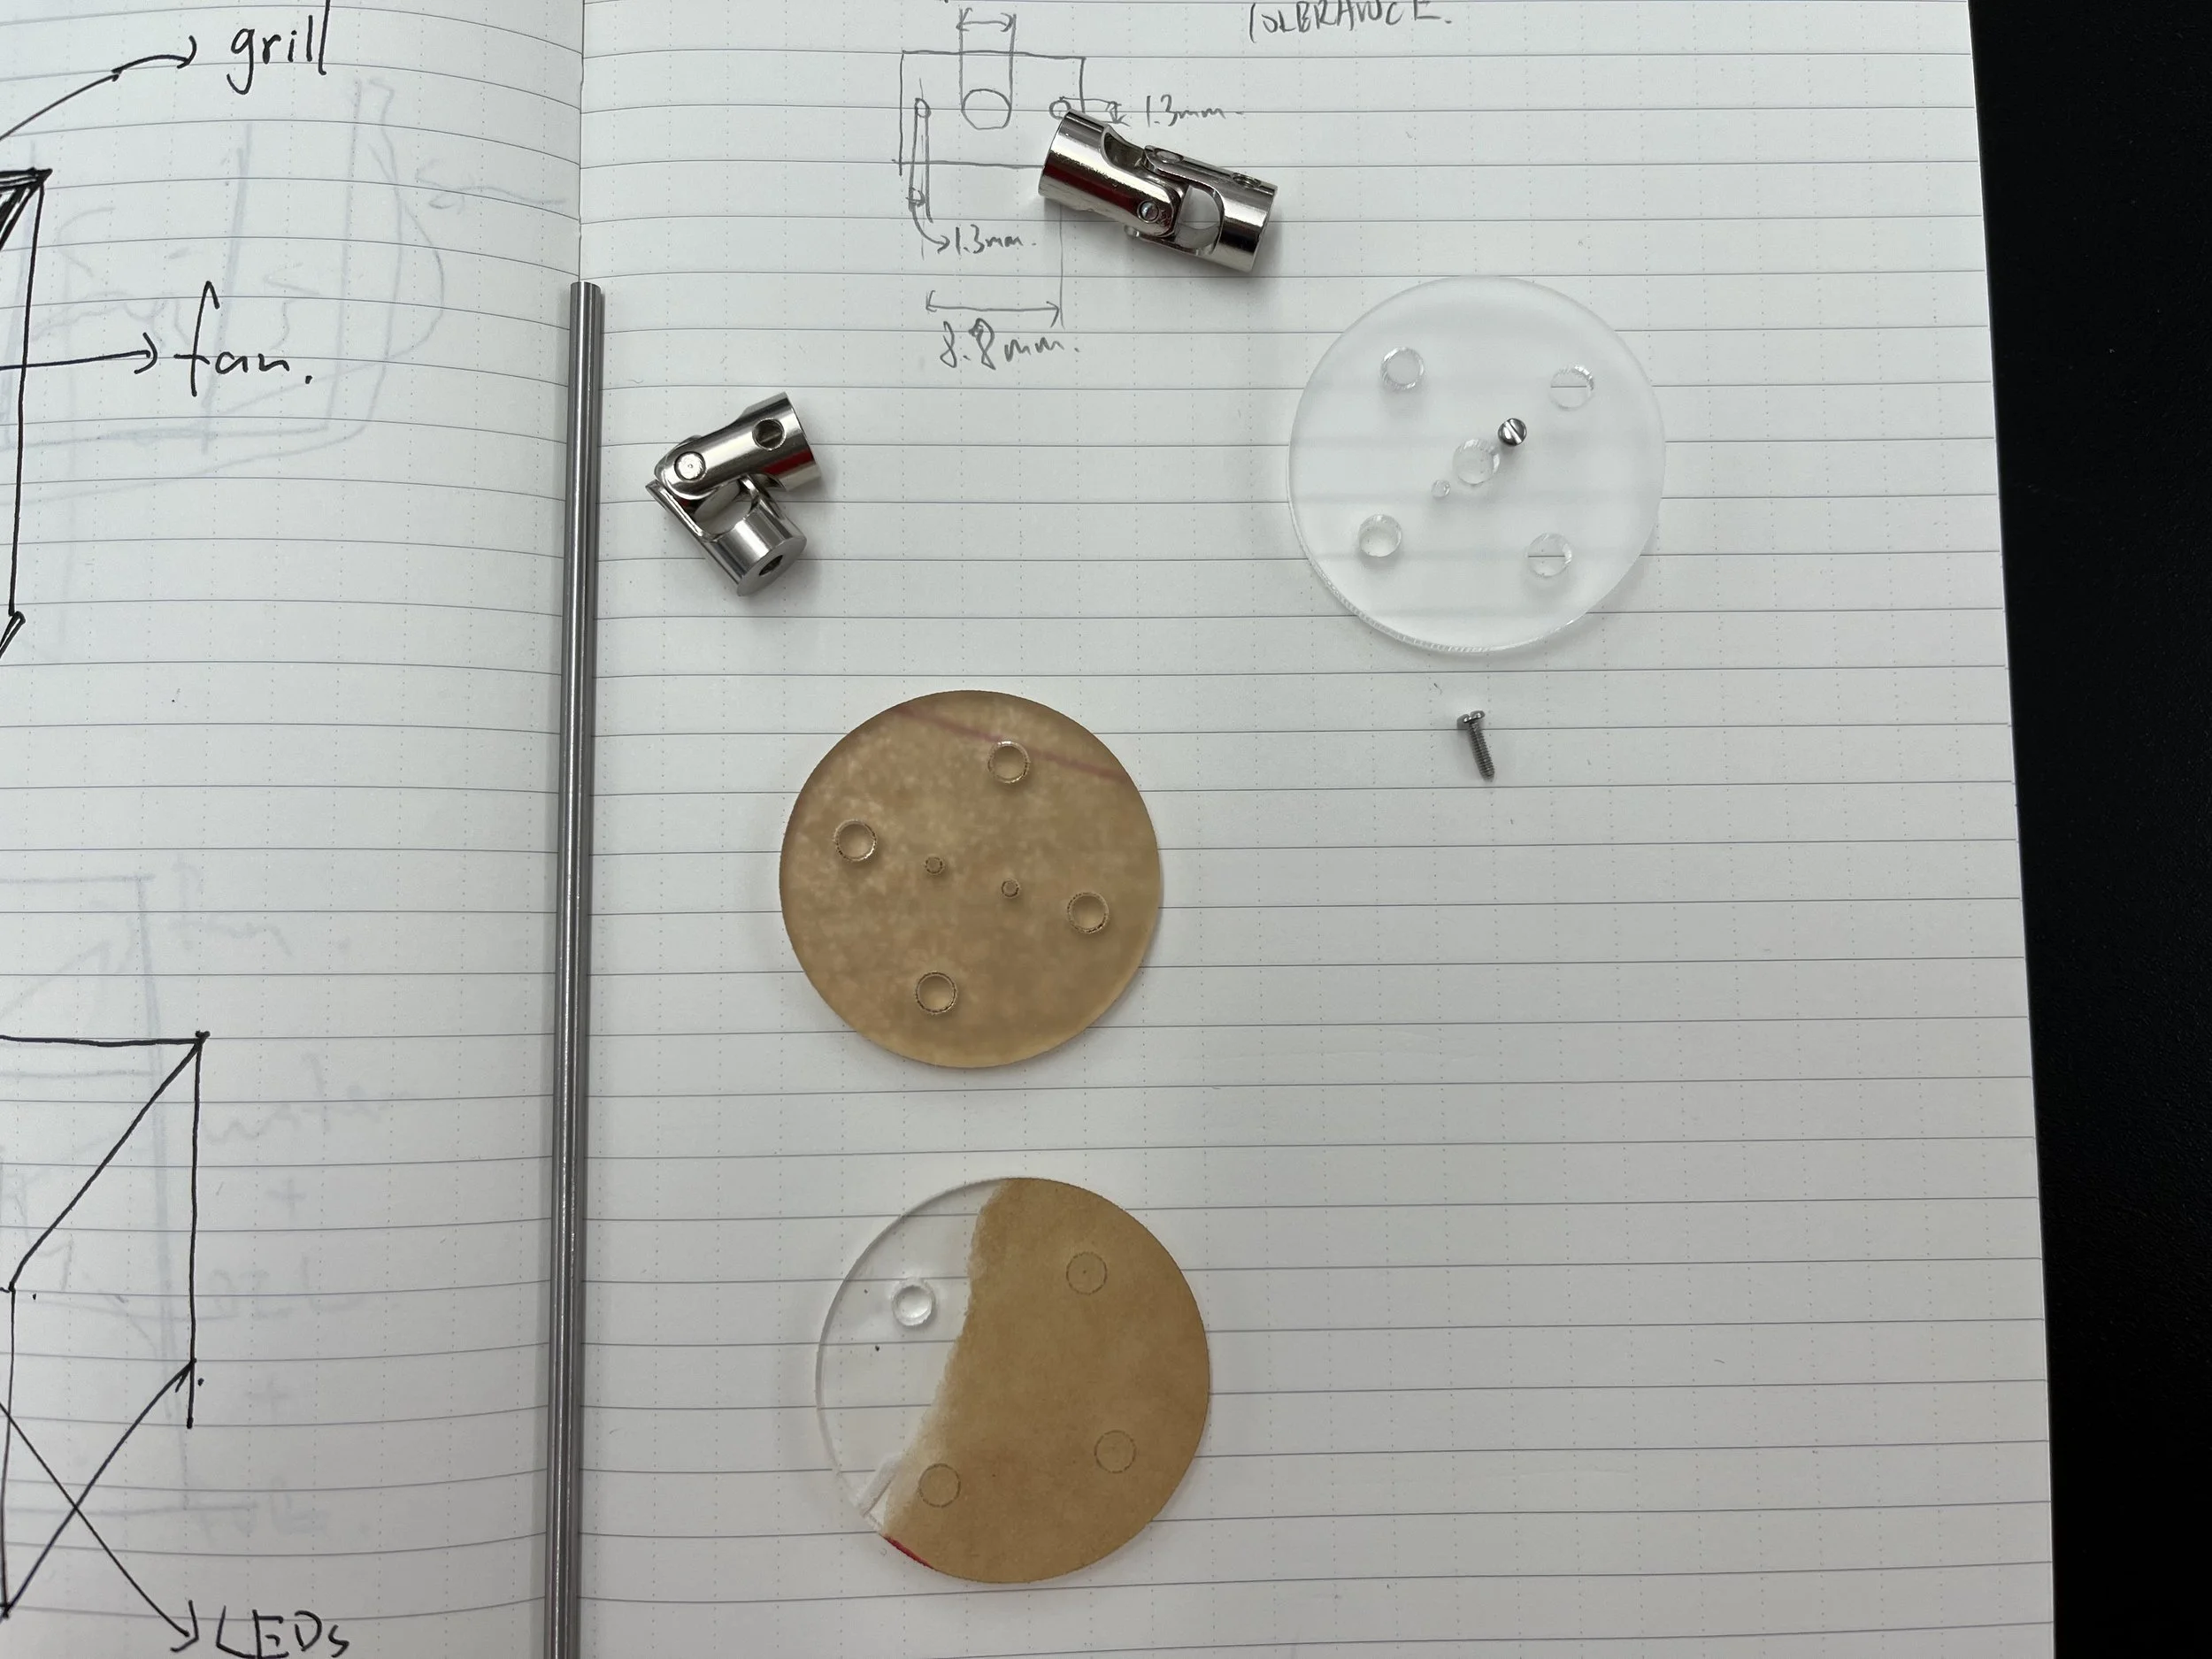
figure 1 - items are all not as expected
figure 2 - laser cut the base


figure 3 - 1.3mm screws
figure 4 - 1.3mm screws


figure 5 - standoffs are on
figure 6 - its really small

figure 7 - shaft coupler and rod are on
figure 8 - screwed into a base, and switched is added


figure 9 - worked after a lot of failures
figure 10 - happy accident due to friction


video 2 - more circles
video 1 - drawing circles
video 3 - time lapse I
video 4 - time lapse II
photo credit: Kai
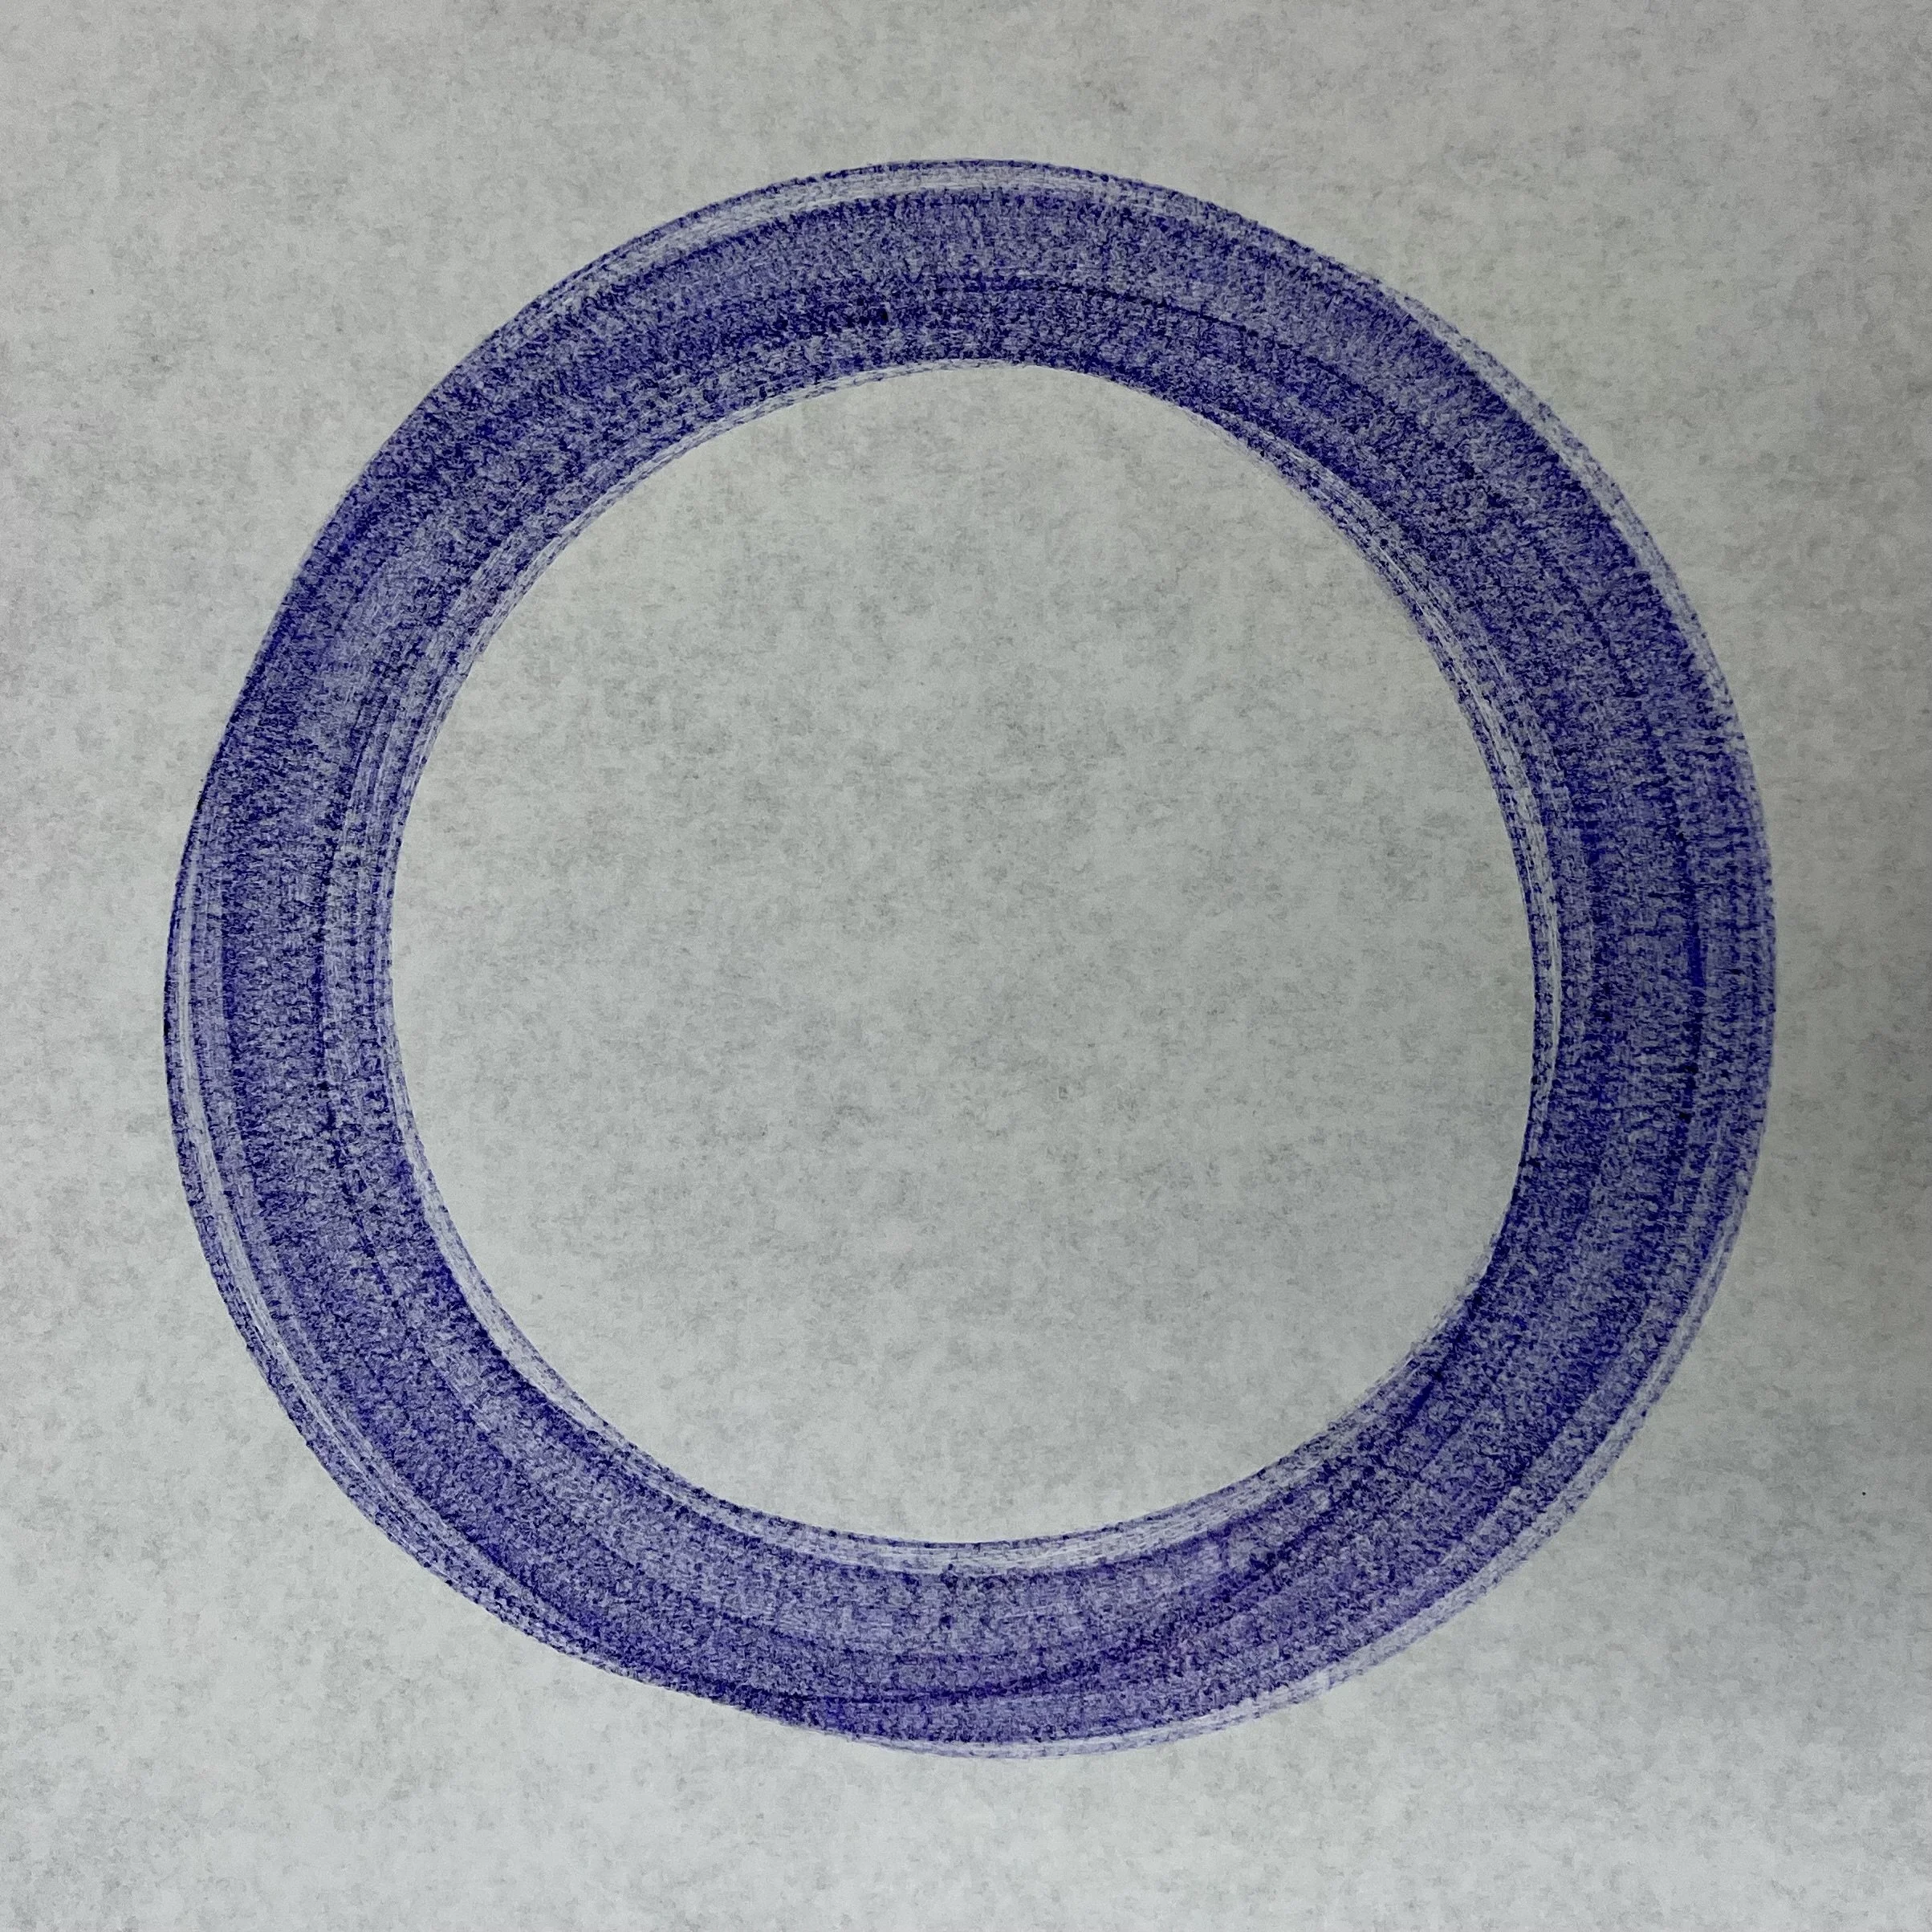
drawing I
drawing II
drawing III
a 60-minute time-lapse video
Personally, I think this class is extremely fun, and I learned a lot, although I have some fabrication experiences from architecture school. It is a nice way to end it with the drawing of the circles, which is such a memorable product.

Probably the last “TNO” for fabrication this semester with the boys. I’m gonna miss it.
